 ‘How to install Google Universal Analytics for my WordPress blog?’ This question has been floating around for a while. Look no further. Now there is a plugin to solve this issue.
Google Universal Analytics for WordPress is now available
Follow the steps to start using it now. It will take less than 5 minutes!
Step 1: Download the plugin
Go and download the plugin to your computer from the link provided below.
Download Google Universal Analytics plugin for WordPress

Google Universal Analytics plugin for WordPress
Step 2: Upload the plugin via FTP
Upload google-universal-analytics directory to the /wp-content/plugins/ directory via FTP client.
Step 3: Install it
Activate the plugin through the ‘Plugins’ menu in WordPress. Note that you must be logged in as administrator!
Step 4: Configuration
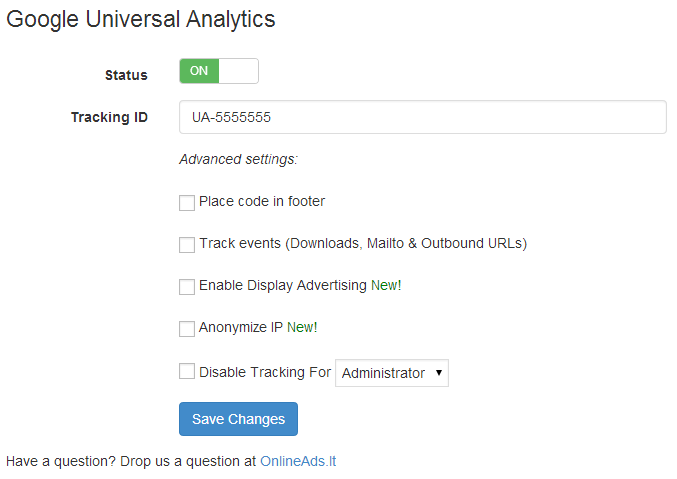
Turn status button ‘ON’ and add the web property ID from Google Analytics (UA-23710779-8, etc.) to the settings (Admin > Google Universal Analytics) as displayed below:

Additionally you can select some of the ‘Advanced settings’ if needed. These include ‘Event tracking’, ‘Remarketing’ (Enable Display Advertising option), ‘IP Anonymization’ and others.
If you have followed these steps, Google Universal Analytics plugin should now be installed and working! The information may take some time to appear in your Analytics account. For some it is a matter of minutes, for others it may take longer. In some cases up to 2 days. So be patient!
However, if something goes wrong do not hesitate to contact us. I am here to help!


0 Comments